Color-blocking ruled the runway this season at Jil Sander, Gucci, and Prabal Gurung's fashion shows. But don't worry, this hot fashion statement doesn't stop after the first leaves fall—makeup artist Pat McGrath continued the bright trend into autumn with Dior's bold and graphic fall 2011 couture makeup. Keep reading for an easy and fun neon nail tutorial that's less expensive than a trip backstage.
What You'll Need:

- Base Coat
- Top Coat
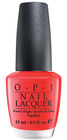
- 3 Neon Nail Polish Shades (we're usingOPI Need Sunglasses and two Forever 21 Nail Polish Colors)
- Thin Art Store Brush
STEP 1 Base Coat
In broad, even strokes, apply a thin layer of your favorite base coat. Allow 3-5 minutes of drying time before applying your first coat of color.
STEP 2 Base Neon Polish

Apply two coats of your lightest neon shade as the base color. In this case, yellow was our lightest shade (we tried applying the purple and pink and the color-blocking just doesn't work as well—use a pale base and your other shades will pop!). Allow 5-10 minutes drying time.
STEP 3 Start Blocking!
Take one of your neon shades and dot some product onto a disposable plastic base (saran wrap or foil works perfectly). Use your art brush to pick up the polish and start drawing random geometric outlines on each finger. Use a steady hand to get the line as straight as possible. If you're feeling shaky, you can tape off each section of your nails with removable scotch tape (but you must wait until your base color is totally dry before applying the tape).

STEP 4 Fill In & Repeat

Once you've outlined the first shape on each nail, fill in the color with the nail polish brush for your block of color.
After you've given your nails a little time to dry, take your third neon shade and repeat the same technique on every nail.

STEP 5 Second Coat

After you've given your nails even more time to dry, use your nail polish brush to give your color-blocked geometric shapes an extra boost of pigment.
STEP 6 Top Coat

Since you don't want your colors to bleed, wait a little while before applying the top coat. Once fingers have passed the dry test, seal your cool new design with a shiny top coat. Trendy and modern nails? Check.


FEATURED PRODUCTS


Thank you for sharing your thoughts. I really appreciate your efforts and I am
waiting for your next post thank you once again.
Also visit my homepage ... new cellulite treatment